 Melissa
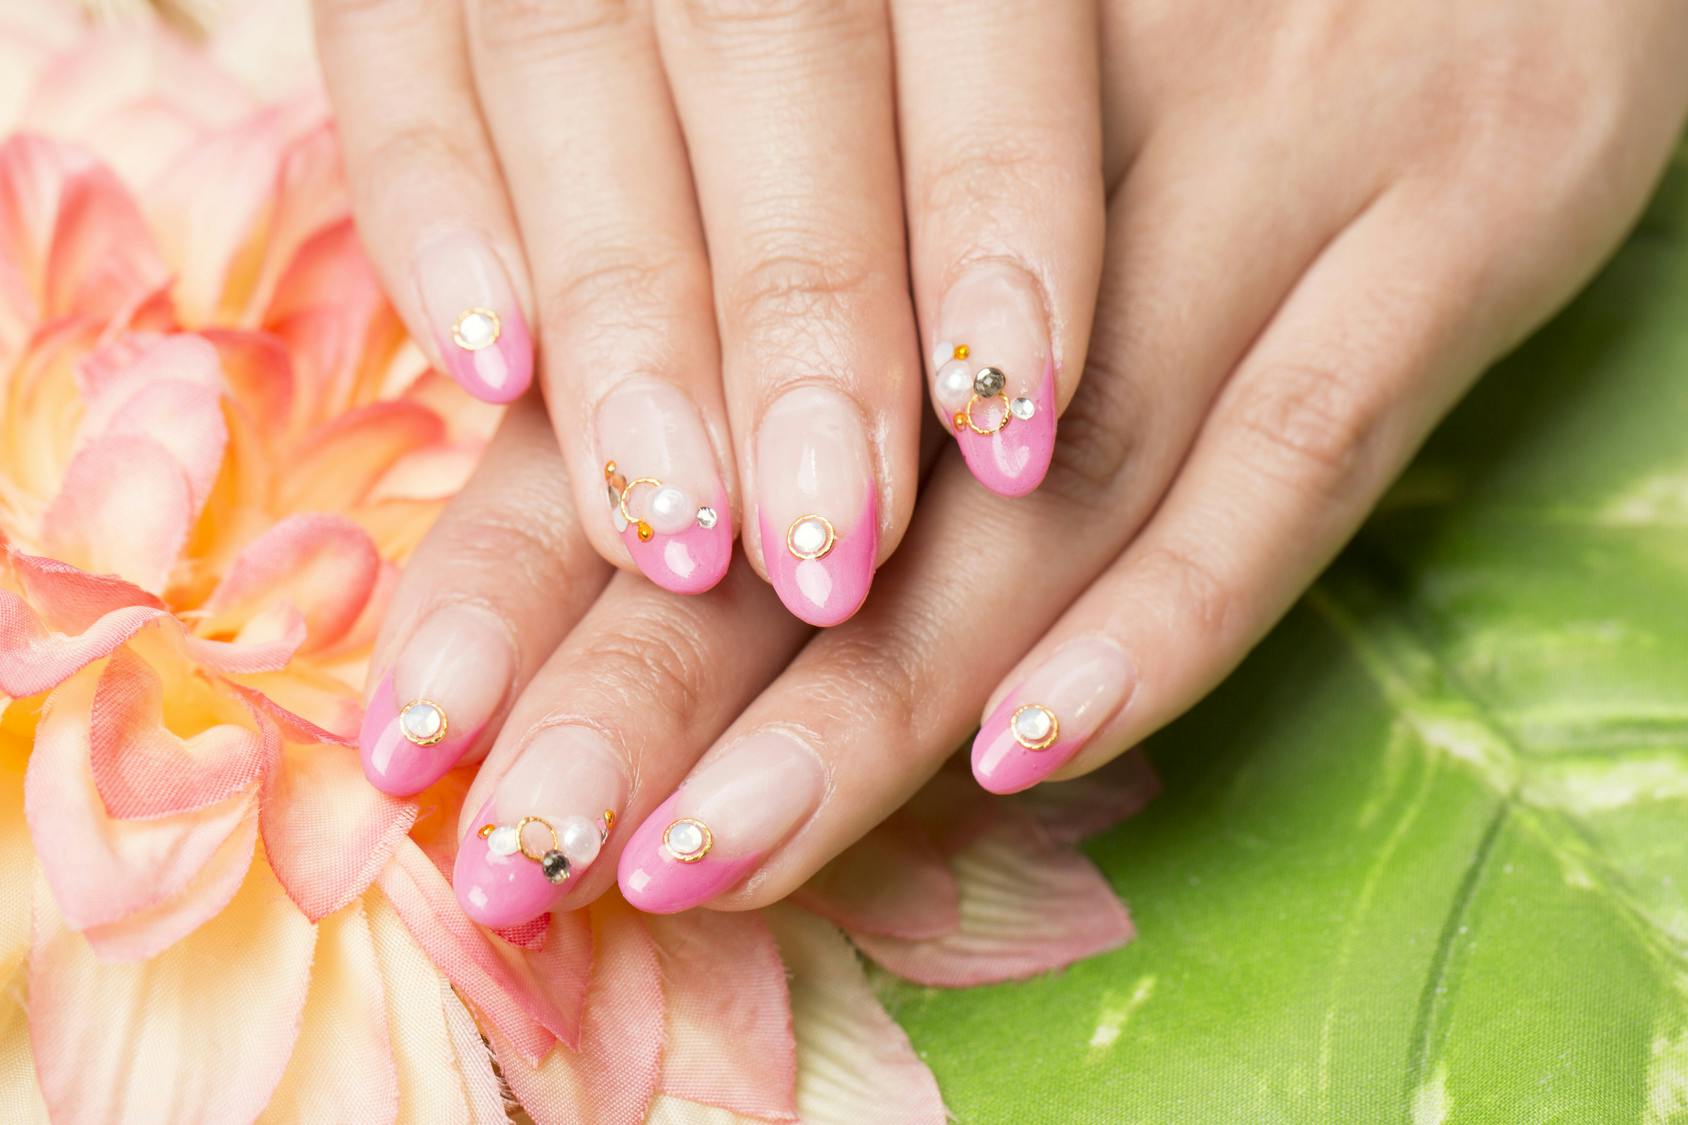
Japan has some of the coolest nail art designs, the kawaii characters, 3D jewels, and pretty nail art patterns. When it comes to cute nail designs, Japan really knows whats up. In general, not only are the designs cute, the products are easy to use, affordable, and overall high quality.
While rocking a 3D bedazzled sculpture-like Japanese nail design is a blast, trying to create that look at home is another story. For the lazy nail girl, who wants a cute design but can’t be bothered to spend the time painstakingly hand painting individual flowers, gluing on gems and sequins one by one, and attempting to draw straight lines using nail tape, there is a quick fix. Enter the nail sticker.
Nail stickers are the perfect lazy girl’s nail solution. Can’t be bothered to make an elaborate design? Don’t have time to let your nails dry? What about a nail design that is quick and easy to not only apply but to remove? Nail stickers are the answer.
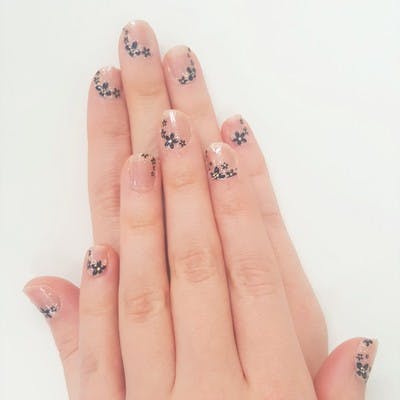
We wanted to try out Japanese nail stickers for ourselves so we tested out the LaDun Elegant 3D Nude Stretch Nail Stickers.
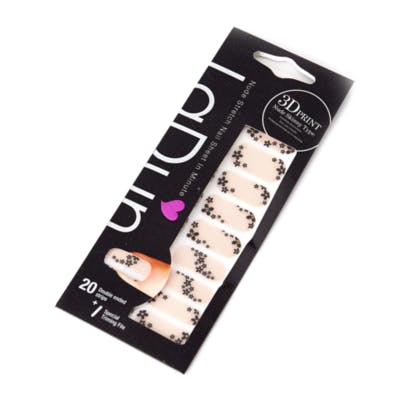
These 3D nude nail stickers feature a small black floral pattern around the edges. It comes with 20 nail stickers in varying sizes, and a small nail file. We recommend using a pair of nail scissors to trim the excess as well. This type of nail sticker covers the full nail, so you can skip the nail polish completely!
Here’s what we found:
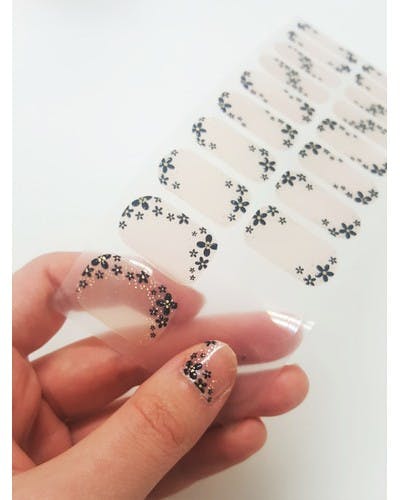
1. Match the sticker shape to your nail size.
If you want to maximize the use of the stickers and use one for every finger and toe, then please be our guest. Feel free to go ahead and create matching fingers and toes with one pack of nail stickers, but be prepared to use the massive XXL sticker on your thumb and have it devour your entire nail and skin around it.
If you don't want to trim the sticker edges before applying and don't want to have the sides stuck to the skin around your nail bed, we recommend matching the width of your nail to the correct sized sticker and then trimming off the excess length from the tip.
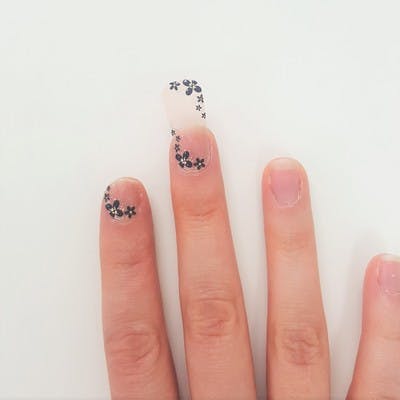
2. File the edge of the sticker underneath your nail
Filing the edge of the sticker underneath your nail isn’t just to help the sticker stay on, it smooths out the edge, giving it a seamless non sticker-like look.
If you don’t file it underneath, you risk getting a very noticeable frayed edge on the sticker.
3. Pair it with a top coat for a long lasting, smooth finish.
For ultra lazy girls, this step is optional. But, if you’re wanting your nails to last longer, a clear top coat will seal your design in and help smooth out any roughness from filing the tips.
Final Thoughts
We were pleasantly surprised by how easy these nail stickers are to apply and how quick it is to get cute nails! For nail stickers that have the clear background like these, applying a color to your nails as the base would also go well with the floral accents and highlight the small gold sparkles in the design.
This type of nail sticker is also great because removing them is simple and leaves no residue or damage to your nails unlike some glue on type nails.
Have you tried Japanese nail stickers? Take this quiz to see which Japanese nail design you should try!
Get these easy to apply Japanese nail sticker for $1.42 USD on JapanHaul!